Category Archives: vegetables

Spicy Grit Bowl with Sweet Potatoes and Greens

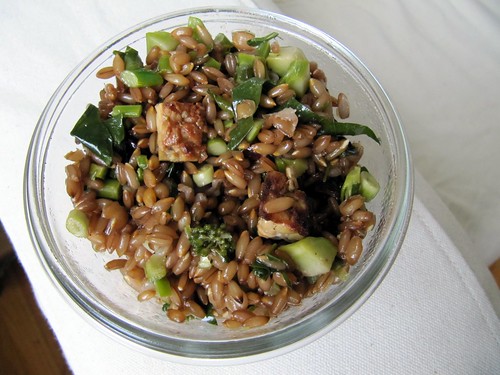
Last night, I made a grit bowl for dinner with a poached egg. It was great, and so were the leftovers, which I took to work with an easily transported soft-boiled egg.

Spicy Grit Bowl


Recipe: Spicy Grit Bowl with Sweet Potatoes and Greens

Summary: A filling, nutritious vegetarian meal that’s full of flavor. This recipe will make approximately six servings but is easily adjusted.

Ingredients

  • 4 sweet potatoes
  • 2 tablespoons olive oil
  • 2 tsp chili powder
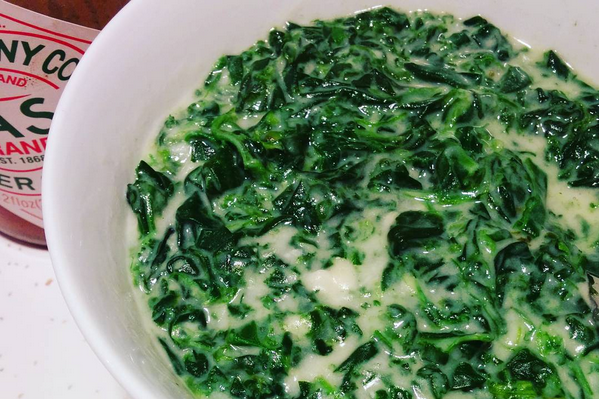
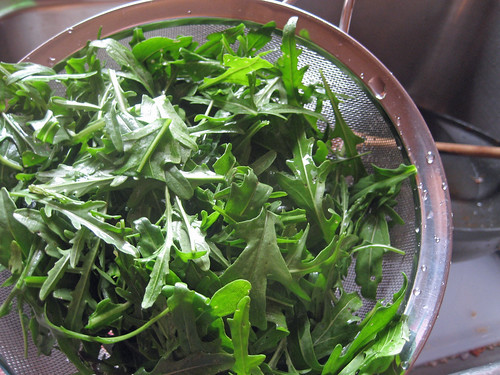
  • 1 large head bok choy (or other greens)
  • 3 cloves garlic
  • 2 tablespoons adobo sauce and 1 to 2 chilis (from the can)
  • 1/2 cup mayonnaise
  • 1.5 cups quick grits
  • 6 cups water (or amount directed on package of grits)
  • 1/2 tsp salt
  • 1/2 cup grated cheese (optional)
  • 6 eggs

Instructions

  1. Preheat the oven to 375.
  2. Wash the sweet potatoes and cut into 1/2 inch cubes.
  3. Toss cubed potatoes with 1 tablespoon oil and chili powder, and roast on a rimmed baking sheet for 30 minutes. While the potatoes are roasting, continue the with the rest of the preparation.
  4. Press the garlic cloves using a garlic press, or chop them finely.
  5. Wash and cut the bok choy into thin slices, keeping the green leaves separate from the stems on your cutting board.
  6. In a skillet, heat the remaining tablespoon olive oil over medium-high heat and sauté the garlic until it is lightly browned, about 1 minute.
  7. Add the bok choy stems to the skillet, occasionally stirring until they are translucent, about 5 minutes. Then, add the leaves and continue stirring until they are wilted, about 5 more minutes. Set aside.
  8. Chop the adobo peppers finely. Stir the adobo sauce and chopped peppers into the mayo to taste.
  9. Cook the grits according to package instructions. In my case, I boiled 6 cups of water with 1/2 tsp salt and slowly added the grits, stirring. Then I reduced the heat, covered the pot, and cooked for 5 minutes.
  10. If using cheese, stir into the cooked grits. Season to taste.
  11. Poach or soft boil the eggs.
  12. To assemble, spoon a portion of grits into each bowl or lunch container. Top half of the grits with sweet potatoes and half with greens. Place the egg in the middle (you may want to clear an area for it first). Top the egg with a tablespoon of spicy mayo.

Preparation time: 40 minute(s)

Number of servings (yield): 6


Truffled Mushroom Pizza

We’d just returned from a weekend out of town and Thursday’s vegetable share was waiting in the fridge. Two of this week’s items were cremini mushrooms from RI Mushroom Co. and pea greens from Allen Farms. We also had a stray shallot and some salty truffled cheese from Tony’s Colonial on Atwells.

Since I was short on time, I picked up a premade pizza crust from the supermarket. What a scam! It was almost $5 and I’d rather be eating the crust I usually make from this recipe, which costs less than 50 cents a pizza. Still, it was a delicious and fast dinner.

Truffled Mushroom Pizza

Recipe: Truffled Mushroom Pizza

Ingredients

  • 1 tbsp olive oil
  • 1 small shallot
  • 8 oz. cremini mushrooms, sliced
  • 2 large handfuls pea greens
  • 2 tbsp butter
  • 3 oz truffled cheese
  • 1 premade pizza crust, or your own dough
  • sea salt
  • freshly ground pepper

Instructions

  1. Preheat oven to 450.
  2. Put dough on a cookie sheet and brush with olive oil (I transferred mine to a pizza stone, whatever you prefer).
  3. Slice shallot thinly, separate into rings, and spread over the crust.
  4. In a large sautée pan, melt 1 tbsp of butter over medium high heat.
  5. Add pea greens and stir until evenly wilted, about 2 minutes.
  6. Spread pea greens over the crust, and top with a grind of salt.
  7. Wipe out the pan and melt the other tbsp of butter.
  8. Add mushrooms and a pinch of salt.
  9. Stir the mushrooms frequently until they let off and then reabsorb their liquid, about 6-8 minutes.
  10. Spread the mushrooms over the crust.
  11. Crumble the truffle cheese over the pizza, and top with a final grind of salt and pepper.
  12. Bake in the preheated oven 8-10 minutes.

Cooking time: 20 minute(s)

Number of servings (yield): 4

My Comfort Meal: Creamed Spinach

When I was single and just barely making the rent, I’d often find creative ways to make a satisfying meal out of frozen vegetables. One of my favorite comfort meals is still a big, slightly spicy bowl of creamed spinach. Here’s how I make it.

Creamed Spinach

Recipe: Really Easy Creamed Spinach

Ingredients

  • 1 10-ounce package of frozen spinach (I prefer whole-leaf, but chopped works too)
  • chopped garlic or onions (optional, and perfectly satisfying without)
  • 2 tbs butter
  • 2 tbs flour
  • 1 c milk
  • Salt
  • Tabasco

Instructions

  1. Defrost the frozen spinach in a pot over medium heat. If you bought the type that’s frozen in a block, it’s especially necessary to heat it for a while, flipping once or twice. But if you have the kind in a bag, it should be really quick.
  2. Meanwhile, in another pot, melt the butter over medium heat. (If you’re adding chopped onions and/or garlic, you can add them to the melted butter).
  3. Sprinkle the flour over the butter and whisk until combined. It’ll be lumpy.
  4. Still whisking, gradually add the milk. As it heats, it’ll combine to form a smooth, thick paste (a.k.a. a roux).
  5. Add spinach to the the milk mixture and stir to combine. If it wasn’t totally defrosted yet, just keep stirring and heating for a minute or two.
  6. Add Tabasco and salt to taste. A grate of nutmeg is also nice.
  7. Eat it by yourself, out of a bowl, without apologies.

See-in-the-Dark Mac and Cheese

My refrigerator’s produce drawers have been heavy with winter vegetables from our produce share.  Marveling at the beautiful orange of my beets and carrots, I did what few childless cooks do – sneakily hid vegetables in mac and cheese!  I would go so far as to say they were completely undetectable.

I like to bake my Mac and Cheese, but this is also good served out of the pot.

Recipe: See-in-the-Dark Mac and Cheese

Summary: Staunch Velveeta fans will have no idea how many vitamins they’re consuming in this tricky, bright orange Mac and Cheese.

Ingredients

  • 3 carrots, peeled
  • 1 large golden beet, roasted and peeled
  • 16 oz elbow macaroni
  • 6 tbsp butter
  • 6 tbsp flour
  • 2 cups milk
  • 2 cups shredded cheese
  • 1/2 cup breadcrumbs
  • salt and seasonings

Instructions

  1. Preheat the oven to 400, start heating your pasta water, and butter a large souffle dish or rectangular baking pan.
  2. Slice the carrots and barely cover with water in a saucepan. Simmer until quite soft, about 15 minutes.
  3. While the carrots are cooking, start the sauce: melt the butter in a large saucepan, whisk in the flour, and add the milk.
  4. Bring the sauce to a boil while stirring, then lower to a simmer and cook for about 5 minutes, stirring occasionally.
  5. In a food processor, puree the carrot slices and diced beet with enough cooking liquid to make a baby food-like consistency. Make sure it is really, really, smooth, stopping to scrape bits off the side if necessary. (I processed for 3-5 minutes).
  6. Stir the bright orange puree and cheese into the sauce, stirring until the cheese is melted. Season with salt and other seasonings if desired (I used a dash of garlic powder and cayenne). Don’t skimp on the salt.
  7. Cook your pasta according to package directions, drain, and toss with the sauce. Pour into the prepared baking dish, top with breadcrumbs, and bake for 30 minutes.

Preserving the Last Life of Summer

It’s the second day of fall and I have a lot to do but instead I have decided to harvest the arugula which I let grow weedy between the bricks in the backyard. I sit in the bright noon sun, plucking leaf after leaf into a large bowl. The arugula is leggy and the honeybees still cling to the yellow flowers even after the stalks are cut and in my hand. The leaves are going to become arugula pesto, made with walnuts and my pungent parmesan smuggled from Europe.

First Harvest
(a much older photo of my wild arugula – 4 years ago)

Our black cherry tomato plant has gone wild, sending branches like tentacles all over the garden. I keep finding bunches of green tomatoes under tables and in other plants. It’s too late, they will never ripen quite like their summer brothers, so I’m pickling them green. Sometime this winter I’ll have a dirty martini or a bloody mary with a pickled tomato garnish and remember the summer.

Slice it Up: Zucchini Tart

A few years ago, when we first joined a CSA, we were swimming in zucchini. Taking my inspiration from vegetable quiches I had been making earlier in the season, I topped a savory custard with thinly sliced zucchini and yellow squash.

Another Zucchini Tart shot

The result was a hit – it kept well in the fridge, tasted good warm or at room temperature, and was perfect for picnics and polo matches.

Zucchini Tart

Here’s my basic recipe. I’m sure you can imagine many variations. I just use what’s in the fridge – I’ve tried it with many cheeses, herbs, etc. and it’s very adaptable.

Recipe: Zucchini Tart

Ingredients

  • your favorite savory crust recipe (I usually use Martha Stewart’s pate brisee – but there’s always Jiffy in a box)
  • 2 medium zucchini
  • 2 eggs
  • 3/4 cup gruyere or similar cheese, shredded
  • 1 c. cream or milk
  • 1 clove garlic, chopped
  • 1 tsp. chopped tarragon
  • Salt and white pepper

Instructions

  1. In a springform tart pan, prepare crust and pre-bake as directed. Set aside to cool.
  2. Preheat the oven to 375.
  3. Cut the round end off the zucchini and slice 1/8 in. thick – much easier with a mandoline!
  4. In a medium bowl, whisk eggs with a fork. Whisk in milk.
  5. Season the egg mixture with some salt, white pepper, garlic, and tarragon.
  6. Sprinkle the grated cheese over the crust.
  7. Gently pour the egg mixture over the cheese into the crust.
  8. Now the fun part: starting around the egde, lay down the zucchini slices one by one, overlapping the edges. Instead of trying to spiral the slices, I find it easier to start with one big circle, then make a smaller circle inside it, and so on. It may look messy at first, but don’t worry, it’ll be fine in the end!
  9. Bake at 375 for 30 minutes or until set. Wiggle it or gently poke a zucchini slice to test.
  10. Allow to cool, slice, and serve.

P.S. When I saw the Slice it Up recipe contest from OXO, I knew I had to enter. I love my OXO tools – for this recipe I’d use my mandoline (actually, I think my parents bought it for my husband, but I’ve taken it over), and my cheese grater.  I’m also totally enamored with my OXO vegetable peeler. I’m not just saying this for a contest, I really do love these tools!

Healthy Rye Berry Salad

I’m always on the lookout for easy summer lunches that transport well and don’t need to be heated.  This salad was imagined to use up some odds and ends.  I didn’t have high expectations but it came out so well, with pleasing textures and flavors.

This is my first time cooking with tempeh, and I’m honestly unsure what motivated me to buy it.  I had my doubts when I tried a piece raw – it tasted horrible!  But marinated and fried, it adds a good flavor and some protein to the salad.

Most of the other ingredients came from Rhode Island growers: the rye berries from Schartner Farms, the broccoli and garlic scapes from Pak Express.  The broccoli was so good that I ate most of the bag instead of putting it in the salad…even the stems were tender.

Hippie Salad

Ingredients

  • 1 package tempeh (I used an 8oz package of LightLife 3 grain)
  • 1 cup dried rye berries
  • a handful garlic scapes (scallions would work too)
  • 1/2 head broccoli (I also used the leaves)
  • orange juice
  • soy sauce
  • olive oil
  • cider vinegar

Directions

  1. Chop the tempeh into 1/2 in cubes and marinate in a mixture of soy sauce and orange juice, just enough to cover.  I used about 2 parts OJ to 1 part soy sauce.
  2. Prepare the rye berries: rinse with cool water and drain.  Bring 2.5 cups water to a boil, add rye berries, turn down the heat and simmer for at least 30 minutes.  If the rye berries are tender but with a bit of chewiness, they’re done.
  3. While the rye berries are cooking, chop the garlic scapes into small (1/8 in) rounds and the broccoli into 1/4 in pieces (or larger if you’d prefer).
  4. In a large bowl, prepare about a half cup of vinaigrette with some cider vinegar, olive oil, and pepper to taste.  It can be a bit on the sharp/sour side because we will add some sweetness – and saltiness – later.
  5. When the rye berries are finished cooking, drain and toss with the vinaigrette, broccoli and scapes.  The warm rye berries will soak up the dressing nicely.
  6. Drain the tempeh, reserving the marinade.  Fry in a skillet with a bit of olive oil, browning on all sides, about 5 minutes.  Pour the reserved marinade into the skillet, allowing it to cook down by about half.   If you used a lot of soy sauce, you might not want to use all the marinade so your salad does not end up too salty.  Mix the tempeh and cooked marinade into your salad, and season to taste if necessary.

CSA Longing

For the last two years, we’ve participated in Zephyr Farm’s CSA.  If you’re not familiar with a CSA, it stands for “Community Supported Agriculture” and is basically a vegetable subscription.   Ours started mid-June and ran through the end of October.


Pickups from the beginning of the season (6/22/2010) and end of the season (9.15.09)

I looked forward to my Tuesday pickups, when I’d walk down the street with my IKEA bag and come back with an Iron Chef-like challenge to imagine a week of dishes with the bag’s contents.  Every second week, we got the most delicious assortment of multi-colored eggs.

This year, we won’t be doing the CSA.  We moved to a new neighborhood, and since J works late and I take the bus, it would be very hard for us to pick up our weekly allotment.  Instead, we’ll be putting aside money to spend at the Saturday farmers’ market, which is luckily in walking distance.  I’ll miss it – maybe one day we’ll be able to join again.

Indian Cauliflower

Cauliflower is like a blank canvas which takes beautifully to strong flavors. I like it roasted with bold spices, in a soup with blue cheese, raw with spicy hummus. Recently I discovered this Indian recipe in an out-of-print book called “Cooking with the Spices of India”. A family friend gave me the book, which came with a box of spices, because he wasn’t so fond of Indian food. I’m very happy he thought of me!

This recipe is out of this world. It might sound involved, but after you make it once, you’ll find it’s totally worth it (and not actually that complicated).

Panch Phoran is a spice mixture composed of fenugreek, nigella seed, mustard seed, fennel seed, and cumin seed.

Cauliflower

Braised Cauliflower with Panch Phoran Yogurt Sauce

  • 1 small onion, peeled and coarsely copped
  • 3 cloves garlic, peeled and coarsely chopped
  • a 1-inch piece fresh ginger, peeled and coarsely chopped
  • 1 cup lowfat yogurt
  • ½ tsp salt
  • 1 tsp sugar
  • 1 head cauliflower (about 2 lbs), separated into bite sized florets
  • 3 tbs vegetable oil
  • 2 whole cloves
  • 2 green cardamom pods
  • a ¾ inch piece cinnamon
  • 1 tsp panch phoran
  • salt, to taste
  • ¼ cup fresh cilantro, coarsely chopped

In a blender, combine the onion, garlic, ginger and 2 tbs of cold water. Puree and transfer half of the paste to a large bowl with the yogurt, salt and sugar. Stir to combine. Mix in the cauliflower florets, turn the florets in the marinade to coat thoroughly and set aside.

In a large skillet, heat the oil over medium-high heat until very hot, but not smoking. Add the cloves, cardamom pods, cinnamon and panch phoran, stir and allow the spices to sizzle and pop, about 30 seconds. Add the remaining half of the garlic-ginger puree and stir for 2 more minutes. Add the cauliflower-yogurt mixture and cook for 3 minutes. Reduce the heat to low, cover and let the cauliflower simmer for 5 minutes. Uncover the pot and finish cooking until the cauliflower is tender, about 12-15 minutes. Check for salt, stir in the cilantro and transfer to a serving dish.

Baked Sauerkraut with Apples

I wanted to share this great sauerkraut recipe I made for our Oktoberfest party.  I’m sure a few of you will stop reading here, but please read on! If you are ambivalent about sauerkraut (I was at one point), this might change your mind. It manages to taste both tangy and buttery, and of course, it’s also a healthy way to get your veggies.

America is in financial turmoil, so I’ll betray my secrets and tell you how I whipped this up on a budget.  We bought jars of Kühne organic sauerkraut, made in Germany, from my favorite secret gourmet store.  If I was making this for dinner tonight, I would have stopped by the farmers’ market for apples, but since I had 20 pounds of apples on my shopping list and a budget to follow, I headed to Price Rite where I got Ginger Gold apples for only 99 cents a pound.

Baked Sauerkraut with Apples
adapted from Lüchow’s German Cookbook

Continue reading Baked Sauerkraut with Apples