Category Archives: sides

Homemade Spam Musubi

Over 5 years after our honeymoon in Hawaii, I’m recreating one of my favorite discoveries of the trip: Spam Musubi.

We picked some up in a convenience store near the volcanoes and it was an unexpectedly good breakfast. It was also the first time I’d ever eaten Spam. Though we had plenty of fresh fruit, raw fish, and other delights, this portable snack stuck in my mind.

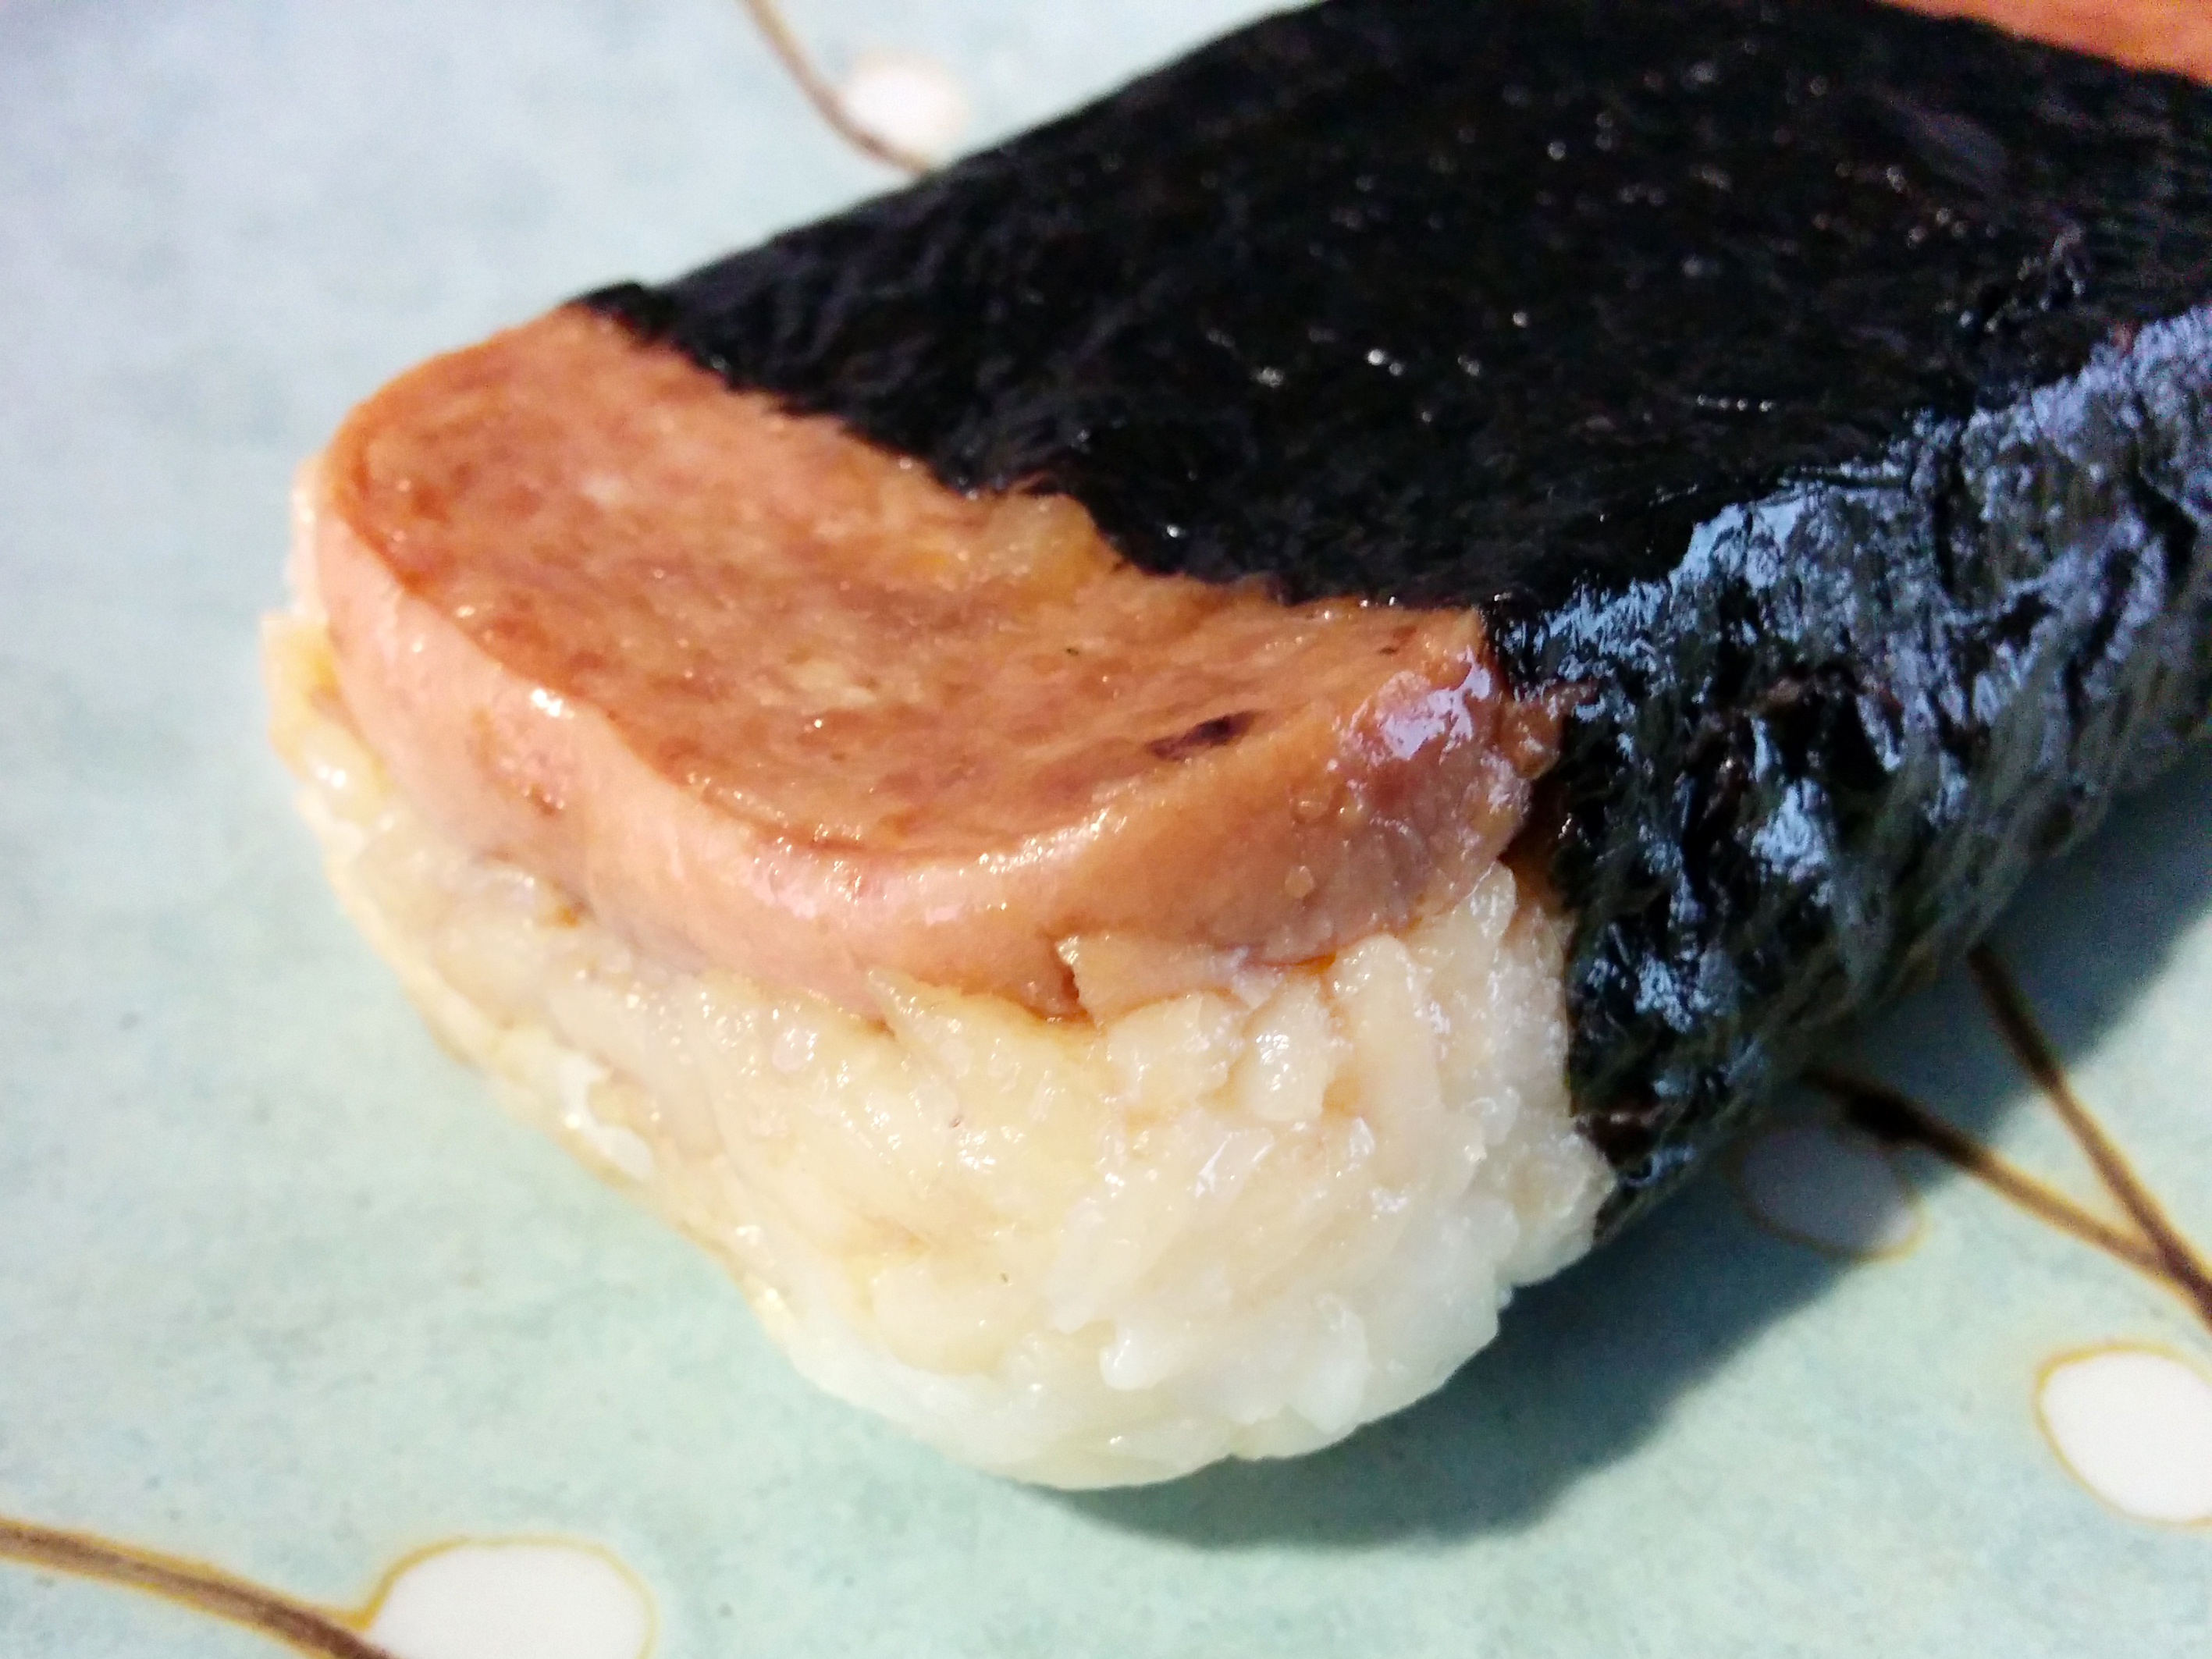
When individually wrapped in cling wrap, these are perfect on-the-go snacks or work lunches. The one in the photo below might be a bit worse for the wear after a trip to work in my bag, but tasted great and held together well.

musubi


Spam Musubi

Makes 10. Adapted from several recipes.

Sushi Rice
  • 2 cups uncooked sushi rice
  • 3 cups water
  • 1/2 cup rice vinegar
  • 1 tablespoon vegetable oil
  • 1 teaspoon salt
  • 2 tablespoons white sugar
Rinse the rice in a strainer or colander. Combine with water in a medium saucepan. Bring to a boil, reduce the heat to low, cover and cook for 20 minutes or until rice is tender and water absorbed.
In a small saucepan, combine the rice vinegar, oil, sugar and salt and stir until the sugar and salt are dissolved. Stir into the cooked rice and continue stirring for a minute or two until the rice is glossy.
Musubi
  • Rice (from recipe above), cooled halfway to room temperature
  • 3 tablespoons soy sauce
  • 3 tablespoons hoisin sauce
  • 3 tablespoons sugar
  • 12 ounce container Spam
  • 3 to 5 sheets sushi nori (dry seaweed), depending on desired width of wrapping strip
  • 2 tablespoons vegetable oil
  1. Slice Spam lengthwise into 10 slices. This sounds difficult, but just cut in half first, then cut each half into 5. It’s easy to cut.
  2. Stir together soy sauce, oyster sauce, and sugar until sugar is completely dissolved.
  3. Brush sauce on both sides of Spam slices and let sit for at least five minutes.
  4. While it’s marinating, saw out the bottom of the Spam can with a box cutter and fold over the edges so they’re not as sharp. Or, if you’re civilized (I’m not), you might own a musubi press.
  5. Heat oil at medium high in a large cast iron skillet. Cook slices until lightly browned; no need to wipe them off, just make sure they don’t burn.
  6. If you’d like, you can brush Spam with any leftover marinade after browning.
  7. Cut seaweed sheets in half (for complete coverage) or thirds (for a narrower strip).
  8. Put a strip of seaweed on your work surface, then the spam can on top, with an opening on the bottom.
  9. Press a handful of rice into the bottom of the Spam can from the top, then top with a slice of Spam,  and press down on the spam. Gently remove the Spam can and wrap one side of the  seaweed strip around the rice and spam.
  10. Dip your hand in a bit of water and wet the remaining length of the seaweed strip, then complete the wrap. The water helps the seaweed stick to itself.
  11. Wrap individually pieces in cling wrap if you’re not going to eat them right away.

See-in-the-Dark Mac and Cheese

My refrigerator’s produce drawers have been heavy with winter vegetables from our produce share.  Marveling at the beautiful orange of my beets and carrots, I did what few childless cooks do – sneakily hid vegetables in mac and cheese!  I would go so far as to say they were completely undetectable.

I like to bake my Mac and Cheese, but this is also good served out of the pot.

Recipe: See-in-the-Dark Mac and Cheese

Summary: Staunch Velveeta fans will have no idea how many vitamins they’re consuming in this tricky, bright orange Mac and Cheese.

Ingredients

  • 3 carrots, peeled
  • 1 large golden beet, roasted and peeled
  • 16 oz elbow macaroni
  • 6 tbsp butter
  • 6 tbsp flour
  • 2 cups milk
  • 2 cups shredded cheese
  • 1/2 cup breadcrumbs
  • salt and seasonings

Instructions

  1. Preheat the oven to 400, start heating your pasta water, and butter a large souffle dish or rectangular baking pan.
  2. Slice the carrots and barely cover with water in a saucepan. Simmer until quite soft, about 15 minutes.
  3. While the carrots are cooking, start the sauce: melt the butter in a large saucepan, whisk in the flour, and add the milk.
  4. Bring the sauce to a boil while stirring, then lower to a simmer and cook for about 5 minutes, stirring occasionally.
  5. In a food processor, puree the carrot slices and diced beet with enough cooking liquid to make a baby food-like consistency. Make sure it is really, really, smooth, stopping to scrape bits off the side if necessary. (I processed for 3-5 minutes).
  6. Stir the bright orange puree and cheese into the sauce, stirring until the cheese is melted. Season with salt and other seasonings if desired (I used a dash of garlic powder and cayenne). Don’t skimp on the salt.
  7. Cook your pasta according to package directions, drain, and toss with the sauce. Pour into the prepared baking dish, top with breadcrumbs, and bake for 30 minutes.

Mediterranean Relish

Last month, we bought a grill and entered a whole new world of outdoor cooking.  While searching our chest freezer for grillable items, I came across lamb hot dogs and lamb kielbasa from a family friend with a farm.  It seemed a shame to top lamb sausage with the usual ball-game ketchup and yellow mustard combo, so I sorted through the jars in our fridge and threw together a condiment with a little class.  It went with the sausage so well, I’ve already made it a few times.

Lamb Kielbasa and Fiddleheads

Mediterranean Relish

  • Black dry-cured olives
  • Red onion
  • Capers
  • Roasted red peppers – I  used jalapenos, but a less spicy alternative might be better
  • Squeeze of lemon juice (optional)

Dice the olives, onion, and red peppers into approximately 1/4 inch pieces.  Mix with the capers and add lemon juice to taste if desired.  Let sit at room temperature while you prepare the sausage.

I think mint or basil would make a tasty addition – what would you add?

Indian Cauliflower

Cauliflower is like a blank canvas which takes beautifully to strong flavors. I like it roasted with bold spices, in a soup with blue cheese, raw with spicy hummus. Recently I discovered this Indian recipe in an out-of-print book called “Cooking with the Spices of India”. A family friend gave me the book, which came with a box of spices, because he wasn’t so fond of Indian food. I’m very happy he thought of me!

This recipe is out of this world. It might sound involved, but after you make it once, you’ll find it’s totally worth it (and not actually that complicated).

Panch Phoran is a spice mixture composed of fenugreek, nigella seed, mustard seed, fennel seed, and cumin seed.

Cauliflower

Braised Cauliflower with Panch Phoran Yogurt Sauce

  • 1 small onion, peeled and coarsely copped
  • 3 cloves garlic, peeled and coarsely chopped
  • a 1-inch piece fresh ginger, peeled and coarsely chopped
  • 1 cup lowfat yogurt
  • ½ tsp salt
  • 1 tsp sugar
  • 1 head cauliflower (about 2 lbs), separated into bite sized florets
  • 3 tbs vegetable oil
  • 2 whole cloves
  • 2 green cardamom pods
  • a ¾ inch piece cinnamon
  • 1 tsp panch phoran
  • salt, to taste
  • ¼ cup fresh cilantro, coarsely chopped

In a blender, combine the onion, garlic, ginger and 2 tbs of cold water. Puree and transfer half of the paste to a large bowl with the yogurt, salt and sugar. Stir to combine. Mix in the cauliflower florets, turn the florets in the marinade to coat thoroughly and set aside.

In a large skillet, heat the oil over medium-high heat until very hot, but not smoking. Add the cloves, cardamom pods, cinnamon and panch phoran, stir and allow the spices to sizzle and pop, about 30 seconds. Add the remaining half of the garlic-ginger puree and stir for 2 more minutes. Add the cauliflower-yogurt mixture and cook for 3 minutes. Reduce the heat to low, cover and let the cauliflower simmer for 5 minutes. Uncover the pot and finish cooking until the cauliflower is tender, about 12-15 minutes. Check for salt, stir in the cilantro and transfer to a serving dish.

Chouriço Mac and Cheese

Providence has a large Portuguese population, so Chouriço is easily found on the supermarket shelves. One way I like to use it is in macaroni and cheese.

Chouriço Mac and Cheese
Photo of chouriço mac and cheese by Jeremy May

Most recently I made this as a Thanksgiving side, and like turkey, it makes for fantastic leftovers. Bake it in ramekins and refrigerate or freeze the individual portions.

Cut one or two chouriço (or chorizo) sausages in quarter inch dice. Cook in a frying pan until it begins to crisp. Prepare your favorite mac and cheese (the recipe I usually use is adapted from this one on the “Heluva Good” cheese website). Stir in the sausage before it goes in the baking dish. Bake and enjoy!