All posts by Stephanie

Chocolate Peanut Butter Granola

As I mentioned in my last post, I like experimenting with granola ingredients. My favorite lately has been chocolate and peanut butter – even more addictive than the classic honey granola I posted last time, and a great homemade gift for the holidays. You may want to adjust the sugar and salt depending on the type of peanut butter you use. I prefer Teddie Natural Chunky peanut butter, which is unsweetened but salted.

Recipe: Chocolate Peanut Butter Granola

Ingredients
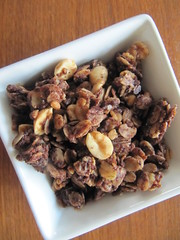
Chocolate Peanut Butter Granola

  • 2 c oats (not quick)
  • 1/2 tsp salt
  • 1/4 c cocoa powder
  • 1/2 c salted peanuts
  • 1/3 c canola oil (or other neutral oil)
  • 1/3 c peanut butter
  • 1/3 c honey
  • 1/4 c brown sugar, packed
  • 1 tsp vanilla extract

Instructions

  1. Preheat oven to 350.
  2. In a large bowl, toss oats, salt, cocoa powder and peanuts.
  3. In a saucepan, heat oil, peanut butter, honey, brown sugar, stirring occasionally, until the sugar has dissolved and the mixture bubbles a bit. Remove from heat and stir in vanilla.
  4. Pour liquid ingredients into the oat mixture and stir until the oats are evenly coated.
  5. Spread oats onto a nonstick cookie sheet. Bake for 10 minutes, then remove and gently toss the granola (if you want chunkier granola, just run a spatula under the granola and gently rearrange). Turn off the oven and put the granola back in for up to an hour to dry, tossing once more along the way.
  6. When granola is cool, store in an airtight container.
  7. Now the hardest part: try not to eat it all.

Number of servings (yield): 12


Best Granola Recipe

Making your own granola is easy and delicious. Addictively delicious. I can’t tell you how long the shelf life is because we eat it so quickly, especially when there’s a batch of homemade yogurt in the fridge.

Here’s my basic recipe, adapted from others I found.  After the recipe, I’ll give you my favorite add-ins.

1. Preheat the oven to 350.

2. Mix in a large bowl:

  • 3 cups rolled oats (NOT quick)
  • 1 tbsp cinnamon
  • 1 tsp salt
  • 1/2 cup nuts (I use almonds)

3. Heat in a small saucepan, stirring a few times, until the sugar dissolves and the  mixture starts bubbling:

  • 1/2 cup honey
  • 2-3 tbsp brown sugar
  • 1/4 cup neutral oil, such as canola oil
  • 1/4 cup water or juice (I like orange juice)

4. Once heated, stir in:

  • 1 tsp vanilla extract

5. Now pour the hot honey mixture into the oats and stir – make sure to stir all the way down to the bottom so all the oats get coated.  Spread on a non-stick or sprayed cookie sheet and place in the middle or top of the oven for 7 minutes.

6. Remove from the oven, stir, turn the heat down to 225 and bake for 30 more minutes, checking once in a while to make sure it’s not burning (or turn off the oven and leave in for an hour or more).

That’s it!

Homemade Granola

Variations:

Optional / swappable add-ins to the oat mix in step 2. You will probably want at least some nuts, but don’t feel like you need this long list of ingredients, you don’t!

  • 1/4 cup pumpkin seeds
  • 1/4 cup sesame seeds
  • 1/4 cup flax seeds (for healthy granola)
  • 1/4 cup wheat germ (for healthy granola)

Optional flavoring in step 4: almond extract, or why not orange?

Baking method: Depending on your ingredients, your baking time might vary. To test, I put a tiny bit in a dish and cool to see if it’s crunchy enough. You want your granola to be dry.  I’ve experimented with a lot of baking methods, sometimes if I don’t have time to watch it, I will bake for an hour at a lower temperature, or if I notice it’s not dry enough after baking, I’ll leave it in a warm but turned-off oven for an hour or so.  You can also bake it at a higher temperature for a shorter time, but you risk burning if you tend to multitask like me.

Type of Granola: If you want a healthier, less sweet granola, you can use more oats (4 cups instead of 3).  If you want a sweeter granola that holds together in big chunks, decrease the oats relative to the other ingredients.

Three Days of Salmon

After a fishing trip to Alaska last year (which I still need to blog about), we have some large pieces of salmon in the freezer. As someone who rarely cooked fish before, this has given me a wonderful opportunity to try new recipes and cooking techniques.

The large pieces sometimes mean several days of salmon.  Crafting a new meal out of leftovers is a creative exercise of which I’m very fond!  Here’s how I got three delicious meals out of one generous piece of salmon.

Day 1
Dinner: White wine-poached salmon topped with Pungent Parsley and Caper Sauce.  Green and yellow beans almondine.

Salmon SandwichDay 2
Lunch: Salmon sandwiches on 7 Stars Olive Bread spread with leftover Parsley and Caper sauce.

Day 3
Brunch:  Salmon cake benedict on 7 Stars Olive Bread with bearnaise sauce.  The leftover salmon and sauce made 5 salmon cakes when mixed with some onion, egg, old bread, and spices.

Sometimes, leftovers can be quite luxurious.

Pictured above: A salmon sandwich I made on olive bread – albiet a different one

Rhode White & Blue

My in-laws visited last weekend and we crammed as much sun, ocean, and seafood as possible into four days. This is almost the perfect Rhode Island holiday weekend, so I had to share our itinierary.

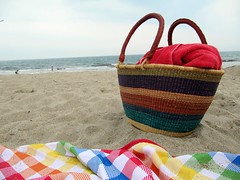
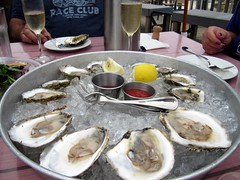
On the beach Oysters
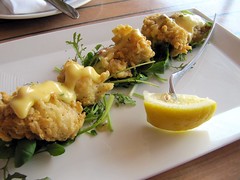
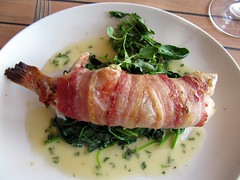
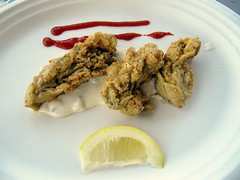
Fried Oysters IMG_1189

Saturday

  • Sailing lesson in the morning (just J & I, it was our first)
  • Wine tasting at Newport Vineyards
  • Polo (our picnic of choice is antipasto from Federal Hill)
  • Walk for an ice cream cone

Sunday

  • Beach day! First to Scarborough. Swam in the ocean.
  • Lunch at Matunuk Oyster Bar
  • More beach time at Matunuk beach.

Monday

  • Eggs benedict at home
  • Bike ride to the nation’s oldest 4th parade in Bristol (40mi round trip)
  • Sushi
  • A drink at the neighborhood bar
  • Watched Providence fireworks from the comfort of our street

Tuesday

  • Dunkin’ Donuts breakfast (a Rhode Island tradition, ha)
  • Tennis at the Intl Tennis Hall of Fame in Newport, a historic building with grass courts
  • Lunch between matches at The Mooring, where we were drawn in by the seafood donuts on the menu. They were as good as they sounded – Bag of Doughnuts: Lobster, crab & shrimp fritters with chipotle-maple aïoli

Do you have a favorite Rhode Island (or local to you) 4th of July tradition?

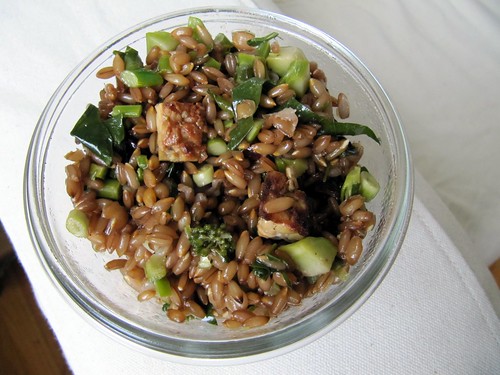
Healthy Rye Berry Salad

I’m always on the lookout for easy summer lunches that transport well and don’t need to be heated.  This salad was imagined to use up some odds and ends.  I didn’t have high expectations but it came out so well, with pleasing textures and flavors.

This is my first time cooking with tempeh, and I’m honestly unsure what motivated me to buy it.  I had my doubts when I tried a piece raw – it tasted horrible!  But marinated and fried, it adds a good flavor and some protein to the salad.

Most of the other ingredients came from Rhode Island growers: the rye berries from Schartner Farms, the broccoli and garlic scapes from Pak Express.  The broccoli was so good that I ate most of the bag instead of putting it in the salad…even the stems were tender.

Hippie Salad

Ingredients

  • 1 package tempeh (I used an 8oz package of LightLife 3 grain)
  • 1 cup dried rye berries
  • a handful garlic scapes (scallions would work too)
  • 1/2 head broccoli (I also used the leaves)
  • orange juice
  • soy sauce
  • olive oil
  • cider vinegar

Directions

  1. Chop the tempeh into 1/2 in cubes and marinate in a mixture of soy sauce and orange juice, just enough to cover.  I used about 2 parts OJ to 1 part soy sauce.
  2. Prepare the rye berries: rinse with cool water and drain.  Bring 2.5 cups water to a boil, add rye berries, turn down the heat and simmer for at least 30 minutes.  If the rye berries are tender but with a bit of chewiness, they’re done.
  3. While the rye berries are cooking, chop the garlic scapes into small (1/8 in) rounds and the broccoli into 1/4 in pieces (or larger if you’d prefer).
  4. In a large bowl, prepare about a half cup of vinaigrette with some cider vinegar, olive oil, and pepper to taste.  It can be a bit on the sharp/sour side because we will add some sweetness – and saltiness – later.
  5. When the rye berries are finished cooking, drain and toss with the vinaigrette, broccoli and scapes.  The warm rye berries will soak up the dressing nicely.
  6. Drain the tempeh, reserving the marinade.  Fry in a skillet with a bit of olive oil, browning on all sides, about 5 minutes.  Pour the reserved marinade into the skillet, allowing it to cook down by about half.   If you used a lot of soy sauce, you might not want to use all the marinade so your salad does not end up too salty.  Mix the tempeh and cooked marinade into your salad, and season to taste if necessary.

Block Island

After almost 9 years of living in Rhode Island, I finally made it to Block Island.  We took an early ferry over on Sunday with our bikes.  The ferry tickets were a surprise gift for surviving the GRE exam on Saturday – I have an amazing husband!

The Taste of Block Island promotion was on, and we benefited with 2-for-1 lobster rolls at the Poor People’s Pub and a giant sundae at Aldo’s Bakery.

2 Lobster Rolls

The lobster rolls were great- we shared one warm with butter, one cold with mayo.  The spicy fried oysters, which were enormous, were also a must-have.   Ice cream is a great way to recover from biking all the hills.  I chose rum raisin and maple walnut topped with the usual, plus raisinettes.

Spicy Fried Oysters Ice Cream Sundae

Between the Dramamine (which I probably didn’t need) and the bike riding, I was exhausted and asleep embarrassingly early.   But I was dreaming about the beautiful shores and beach-rose scented sea air…

Grilled Oysters

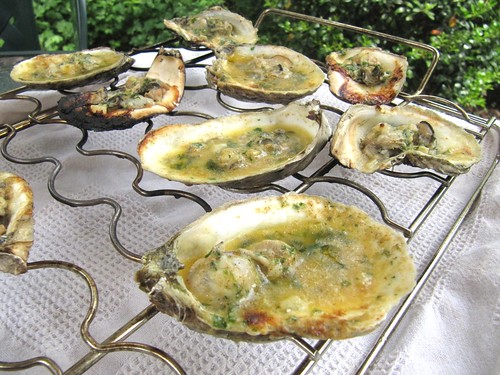
I love raw oysters, so I was skeptical the first time I heard of grilled oysters. Then I tried them at the Acme Oyster House in New Orleans, and I was more than willing to change my mind.

Broiled Oysters

Last weekend, we tried grilling our own, following Emeril’s recipe. The oysters are shucked, topped with a compound butter (with garlic, parsley, chives, lemon juice, cayenne, hot sauce), and grilled (we have a special rack to make sure they don’t tilt and lose those delicious juices, which are divine when soaked up with some crusty bread). They were almost perfect – next time we will add an extra sprinkling of Parmesan for that crispy texture.

Grilled Oysters

As J was shucking the oysters he made an interesting discovery – an Oyster Crab! They’re tiny (1/2″ or less) crabs that live inside oysters. I did exactly what you’d expect me to do: I took a picture of it, Googled it, then fried and ate it.

Mediterranean Relish

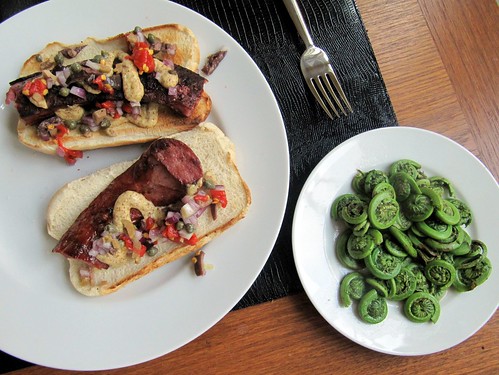
Last month, we bought a grill and entered a whole new world of outdoor cooking.  While searching our chest freezer for grillable items, I came across lamb hot dogs and lamb kielbasa from a family friend with a farm.  It seemed a shame to top lamb sausage with the usual ball-game ketchup and yellow mustard combo, so I sorted through the jars in our fridge and threw together a condiment with a little class.  It went with the sausage so well, I’ve already made it a few times.

Lamb Kielbasa and Fiddleheads

Mediterranean Relish

  • Black dry-cured olives
  • Red onion
  • Capers
  • Roasted red peppers – I  used jalapenos, but a less spicy alternative might be better
  • Squeeze of lemon juice (optional)

Dice the olives, onion, and red peppers into approximately 1/4 inch pieces.  Mix with the capers and add lemon juice to taste if desired.  Let sit at room temperature while you prepare the sausage.

I think mint or basil would make a tasty addition – what would you add?

Vacation Planning with Google Maps

I have a confession: I have a type A personality when it comes to vacation planning.  Luckily, once I’m at my destination, I relax, have fun, and am open to spontaneity.  But from the time I book a vacation until I’m on the plane, I take great pleasure in obsessively researching my destination and collecting places to go.

My favorite tool for vacation planning is the “My Maps” feature in Google Maps.  Here’s how I use it:

  • I create a map for each vacation.
  • Every time I read about a place I’d like to visit, I add it to the map.
  • I choose appropriate icons for each location (like a bed for the hotel, cutlery for restaurants) so they’re easy to spot on the map.
  • If I have additional information about a location, like hours, I add it to the description.
  • I share it with J in case he wants to add to it or view it on the road.

If you’ve never created a map in My Maps, these instructions will get you started.  But you may not need instructions – it’s pretty easy: if you ever find somewhere you’d like to go on Google Maps, you can simply click the place marker and choose Save To Map.  To find your maps, click the My Maps link under the Google Maps logo.

Here’s the map I created for last weekend’s DC trip:

View Washington DC in a larger map

Before I joined the smartphone world, I’d simply print the maps. I even survived a few days of driving around Memphis, mostly alone, based on a 1-page printout.

Now that I have an Android phone it’s even easier, because I can view my map on my phone’s Maps app, which means it integrates with the GPS features.  This is done in the Layers section of Google Mobile Maps (the default Maps app for Android, but also available on other phones).

How do you keep track of must-visit vacation spots?

DC: Mitsitam Cafe

Thanks to Katy for telling me about the Mitsitam Cafe, a cafeteria-style dining spot in the National Museum of the American Indian. I’m glad I previewed the menu on their website – the food service area, which is divided by region, can be overwhelming to the indecisive.  The regions represented are Northern Woodlands, South America, the Northwest Coast, Meso America and the Great Plains.

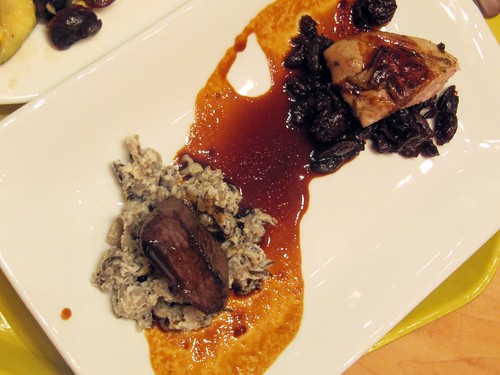
The star of our meal was the Native Woodlands Mixed Grill, which consisted of two delectable appetizers:

  • Cast Iron Seared Breast of Pheasant, Dried Cherry Pemmican
  • Grilled Hardwood Smoked Venison, Wild Rice Pudding, Red Wine Cherry Reduction

This was up my alley – game is always tempting, I love the idea of wild rice pudding and I’m a fan of dried cherries. Both dishes had a good balance of flavors, and the meats were perfectly cooked.   This would be an inspirational addition to a game dinner menu.

Native Woodlands Mixed Grill

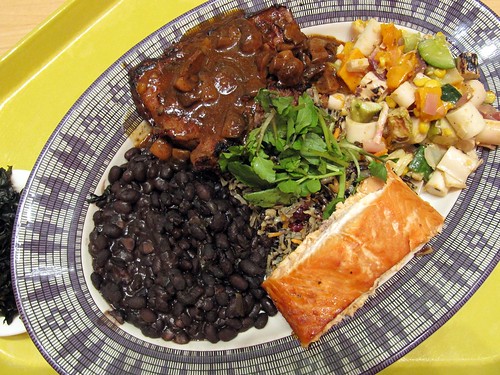
Next, we shared a 5 Region Sampler Platter with two extra sides.

  • Grilled buffalo strip loin
  • Cedar planked salmon
  • Hearts of palm salad
  • Wild rice and watercress salad
  • Black beans
  • Side of seaweed and musrooms
  • Three sisters salad (not pictured – giant beans, corn, squash)

5 Region Sampler Platter

Even though we were ravenous after a 5+ mile morning walk, this was a lot of food – maybe we should have just gotten the buffalo with a couple of sides.  The variety of dishes was irresistible, though.    I’ll be inspired to recreate some of these at home – I didn’t pick up a copy of the Mitsitam Cafe Cookbook during my visit because I was traveling light, but it’ll surely be a part of my next Amazon order.