Category Archives: meals

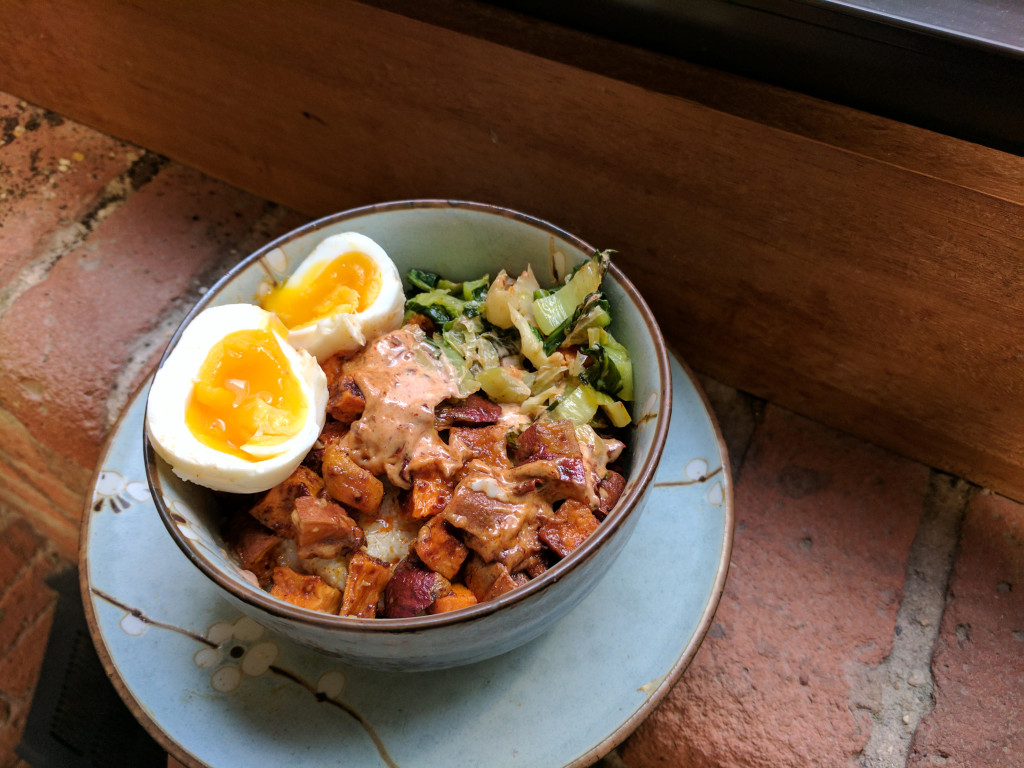
Spicy Grit Bowl with Sweet Potatoes and Greens

Last night, I made a grit bowl for dinner with a poached egg. It was great, and so were the leftovers, which I took to work with an easily transported soft-boiled egg.

Spicy Grit Bowl


Recipe: Spicy Grit Bowl with Sweet Potatoes and Greens

Summary: A filling, nutritious vegetarian meal that’s full of flavor. This recipe will make approximately six servings but is easily adjusted.

Ingredients

  • 4 sweet potatoes
  • 2 tablespoons olive oil
  • 2 tsp chili powder
  • 1 large head bok choy (or other greens)
  • 3 cloves garlic
  • 2 tablespoons adobo sauce and 1 to 2 chilis (from the can)
  • 1/2 cup mayonnaise
  • 1.5 cups quick grits
  • 6 cups water (or amount directed on package of grits)
  • 1/2 tsp salt
  • 1/2 cup grated cheese (optional)
  • 6 eggs

Instructions

  1. Preheat the oven to 375.
  2. Wash the sweet potatoes and cut into 1/2 inch cubes.
  3. Toss cubed potatoes with 1 tablespoon oil and chili powder, and roast on a rimmed baking sheet for 30 minutes. While the potatoes are roasting, continue the with the rest of the preparation.
  4. Press the garlic cloves using a garlic press, or chop them finely.
  5. Wash and cut the bok choy into thin slices, keeping the green leaves separate from the stems on your cutting board.
  6. In a skillet, heat the remaining tablespoon olive oil over medium-high heat and sauté the garlic until it is lightly browned, about 1 minute.
  7. Add the bok choy stems to the skillet, occasionally stirring until they are translucent, about 5 minutes. Then, add the leaves and continue stirring until they are wilted, about 5 more minutes. Set aside.
  8. Chop the adobo peppers finely. Stir the adobo sauce and chopped peppers into the mayo to taste.
  9. Cook the grits according to package instructions. In my case, I boiled 6 cups of water with 1/2 tsp salt and slowly added the grits, stirring. Then I reduced the heat, covered the pot, and cooked for 5 minutes.
  10. If using cheese, stir into the cooked grits. Season to taste.
  11. Poach or soft boil the eggs.
  12. To assemble, spoon a portion of grits into each bowl or lunch container. Top half of the grits with sweet potatoes and half with greens. Place the egg in the middle (you may want to clear an area for it first). Top the egg with a tablespoon of spicy mayo.

Preparation time: 40 minute(s)

Number of servings (yield): 6


Truffled Mushroom Pizza

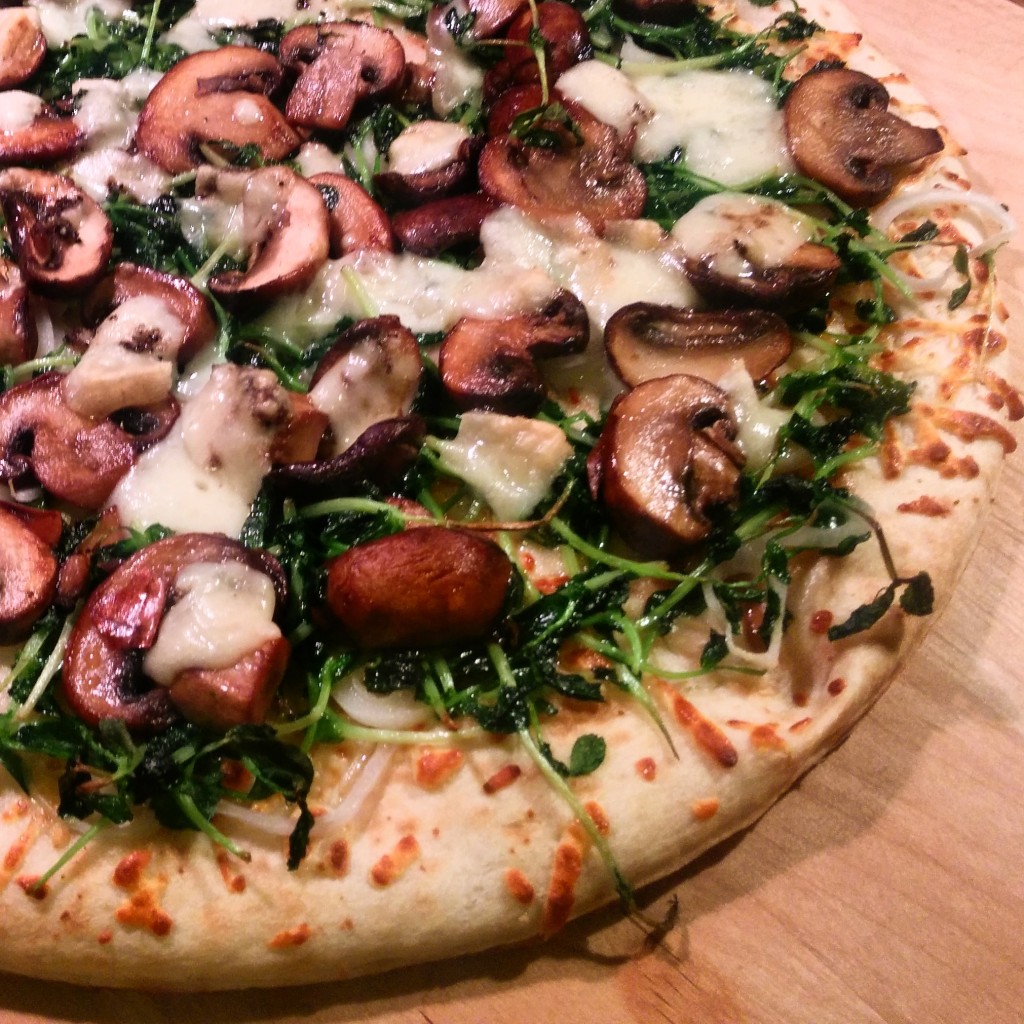
We’d just returned from a weekend out of town and Thursday’s vegetable share was waiting in the fridge. Two of this week’s items were cremini mushrooms from RI Mushroom Co. and pea greens from Allen Farms. We also had a stray shallot and some salty truffled cheese from Tony’s Colonial on Atwells.

Since I was short on time, I picked up a premade pizza crust from the supermarket. What a scam! It was almost $5 and I’d rather be eating the crust I usually make from this recipe, which costs less than 50 cents a pizza. Still, it was a delicious and fast dinner.

Truffled Mushroom Pizza

Recipe: Truffled Mushroom Pizza

Ingredients

  • 1 tbsp olive oil
  • 1 small shallot
  • 8 oz. cremini mushrooms, sliced
  • 2 large handfuls pea greens
  • 2 tbsp butter
  • 3 oz truffled cheese
  • 1 premade pizza crust, or your own dough
  • sea salt
  • freshly ground pepper

Instructions

  1. Preheat oven to 450.
  2. Put dough on a cookie sheet and brush with olive oil (I transferred mine to a pizza stone, whatever you prefer).
  3. Slice shallot thinly, separate into rings, and spread over the crust.
  4. In a large sautée pan, melt 1 tbsp of butter over medium high heat.
  5. Add pea greens and stir until evenly wilted, about 2 minutes.
  6. Spread pea greens over the crust, and top with a grind of salt.
  7. Wipe out the pan and melt the other tbsp of butter.
  8. Add mushrooms and a pinch of salt.
  9. Stir the mushrooms frequently until they let off and then reabsorb their liquid, about 6-8 minutes.
  10. Spread the mushrooms over the crust.
  11. Crumble the truffle cheese over the pizza, and top with a final grind of salt and pepper.
  12. Bake in the preheated oven 8-10 minutes.

Cooking time: 20 minute(s)

Number of servings (yield): 4

Mardi Gras Dinner Party

For the past few years, I’ve looked at the calendar the night before Mardi Gras and swore that the next year, I would remember to invite people over for a dinner party. This year we finally did.

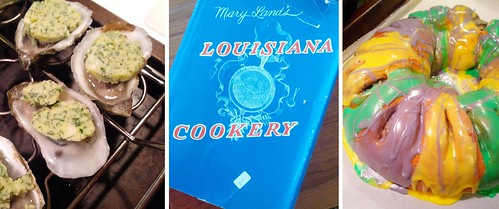
Mardi Gras Dinner

Our menu:

Muffaletta Spread  *  Fried Peanuts  *  Pickled Okra
Raw Oysters  *  Grilled Oysters
Jambalaya (with andouille, chicken, and shrimp)
Bananas Foster  *  King Cake

(Who doesn’t want two desserts?)

This was a low-stress meal. The jambalaya comes together in under and hour and requires no fussing or fancy plating; I did the chopping ahead of time and started cooking while we drank cocktails and ate snacks. Our guests brought a ton of oysters and a pitcher of hurricanes.

Recipes:

See-in-the-Dark Mac and Cheese

My refrigerator’s produce drawers have been heavy with winter vegetables from our produce share.  Marveling at the beautiful orange of my beets and carrots, I did what few childless cooks do – sneakily hid vegetables in mac and cheese!  I would go so far as to say they were completely undetectable.

I like to bake my Mac and Cheese, but this is also good served out of the pot.

Recipe: See-in-the-Dark Mac and Cheese

Summary: Staunch Velveeta fans will have no idea how many vitamins they’re consuming in this tricky, bright orange Mac and Cheese.

Ingredients

  • 3 carrots, peeled
  • 1 large golden beet, roasted and peeled
  • 16 oz elbow macaroni
  • 6 tbsp butter
  • 6 tbsp flour
  • 2 cups milk
  • 2 cups shredded cheese
  • 1/2 cup breadcrumbs
  • salt and seasonings

Instructions

  1. Preheat the oven to 400, start heating your pasta water, and butter a large souffle dish or rectangular baking pan.
  2. Slice the carrots and barely cover with water in a saucepan. Simmer until quite soft, about 15 minutes.
  3. While the carrots are cooking, start the sauce: melt the butter in a large saucepan, whisk in the flour, and add the milk.
  4. Bring the sauce to a boil while stirring, then lower to a simmer and cook for about 5 minutes, stirring occasionally.
  5. In a food processor, puree the carrot slices and diced beet with enough cooking liquid to make a baby food-like consistency. Make sure it is really, really, smooth, stopping to scrape bits off the side if necessary. (I processed for 3-5 minutes).
  6. Stir the bright orange puree and cheese into the sauce, stirring until the cheese is melted. Season with salt and other seasonings if desired (I used a dash of garlic powder and cayenne). Don’t skimp on the salt.
  7. Cook your pasta according to package directions, drain, and toss with the sauce. Pour into the prepared baking dish, top with breadcrumbs, and bake for 30 minutes.

My Favorite Pizza Dough Recipe

Making pizza can is fun and tasty. And especially if you make your own dough, it’s cheap. My go-to dough recipe is by Anna Maria Volpi and I recommend her helpful step-by-step photos for beginners. The dough is easy to handle and I use it to make three thin pizzas. My abbreviated version is below.

Also, my number 1 tip for making CHEAP pizza dough is to buy yeast in bulk. I did the math and the little 3-portion packets in the baking aisle at the supermarket are – wait for it – 20 times more expensive than the $4.39 2 pound package I bought at Sam’s Club.

Recipe: Pizza Dough

Summary: Adapted from Anna Maria Volpi’s Recipe to use a stand mixer.

Ingredients

  • 1 tbsp active dry yeast
  • 1 1/2 cups 110 degree water
  • 3 1/2 cups flour
  • 1 tbsp olive oil
  • pinch of salt
  • healthy shake of garlic powder (optional)

Instructions

  1. Measure the warm water in a measuring cup, sprinkle the yeast on top, stir, and let sit for 5 minutes.
  2. Sift the flour and salt into the bowl of a stand mixer (like a Kitchen Aid). Stir in the garlic powder.
  3. Make an indentation in the middle of the flour mixture and pour in the olive oil and yeast/water mixture.
  4. Mix with the beater blade until all the ingredients are combined, then switch to the dough hook and allow the mixer to knead slowly for 3 minutes or so. The dough should hold together nicely and not stick to the bowl. The proportions are usually perfect for me, but you could sprinkle in a bit more flour or water if it’s too wet or dry.
  5. By now the mixer bowl is basically clean, so I remove the dough, rub the inside of the bowl with olive oil, return the dough, flip it over to coat it all with olive oil, and make a cross in the top with a knife.
  6. Cover the bowl with a damp, clean kitchen towel and allow it to sit until doubled, about an hour and a half. I usually put my oven on the lowest setting (170) for a couple of minutes, turn it off, and then put the bowl in the slightly warmed oven to rise.

Restaurant Leftovers

Restaurant portions can be huge, so I’ll often end up with leftovers. Some people have a serious aversion to leftovers (I don’t get it), and others eat cold pizza or Chinese food for breakfast the next day (I don’t get that either).

My favorite thing to do with leftovers? Freeze them in small portions for work lunches. I’ve talked about my dedicated work lunch freezer drawer, and while most of it is home cooked, it’s great to bring along a memory from a favorite restaurant. Yesterday was the first afternoon warm enough to eat my lunch outside, and I enjoyed Eggplant and Shrimp with Garlic Sauce over rice, from Gold Stone. We’d been over a month ago and it was great to revisit the tender eggplant and flavorful sauce.

First Al Fresco Lunch of 2013


Another way to enjoy leftovers is by transforming them into another dish. We came home from Gold Stone with a lot of rice, so I made the extra into rice pudding – just simmer with milk, sugar, raisins, and spices for a half hour or so. Sometimes I’ll bring home a choice piece of meat or fish to eat on a salad the next day. If  you’re not fond of leftovers, why not make a completely new meal out of them?

Red Quinoa and Greens with Fried Tofu Triangles

It’s always a pleasure to unpack a delicious, healthy lunch on a Monday. Today’s was leftovers from a dinner I cooked on Saturday – I enjoyed it and thought I’d share the recipe.

Red Quinoa and Yukina Savoy with Fried Tofu Triangles


Red Quinoa and Greens with Fried Tofu Triangles

Ingredients

  • 1 cup Red Quinoa
  • 2 cups water
  • 1/2 tsp salt
  • 1 small shallot, finely diced
  • 1 bunch greens, coarsely chopped (I used Yukina Savoy)
  • 1 package of extra firm tofu
  • 1/2 cup flour
  • 1 tbsp seasoning salt (I used Texas Hot Salt), or your own mixture of salt and spices
  • 4 tablespoons oil, divided

Instructions

  1. Prepare the tofu: If you have time, remove the tofu from the package and press between two plates lined with paper towels. This is not absolutely necessary but will help dry it out.
  2. Cook the quinoa: bring 2 cups of water to a boil. Rinse the quinoa thoroughly in a strainer, then add to the boiling water along with the 1/2 tsp salt. Bring to a simmer, cover, and simmer for 15 minutes or until the quinoa grains have unfurled. (Not all the water may be absorbed).
  3. While the quinoa is cooking, prepare the greens: heat 1 tbsp oil in a large pan/skillet and sautee the shallot over medium heat until softened, but not browned. Add the greens and continue to sautee, turning the heat down to avoid burning the greens.
  4. Assemble the quinoa: drain the cooked quinoa using a fine strainer and add to the greens. Taste and season as needed.
  5. Fry the tofu: Cut the tofu into triangles. On a plate or in a shallow bowl, combine the flour and seasoned salt. In a skillet, heat 3 tbsp of oil until shimmering. Dip each piece of tofu in the flour mixture and fry, not crowding the pan too much. Flip once when lightly browned (should take 3-5 minutes per side). Remove to a plate (you can keep warm in a toaster oven if necessary).
  6. Serve the tofu triangles on top of the quinoa.

Preparation time: 20 minute(s)

Cooking time: 20 minute(s)

Number of servings (yield): 4

Favorite Thanksgiving Sides

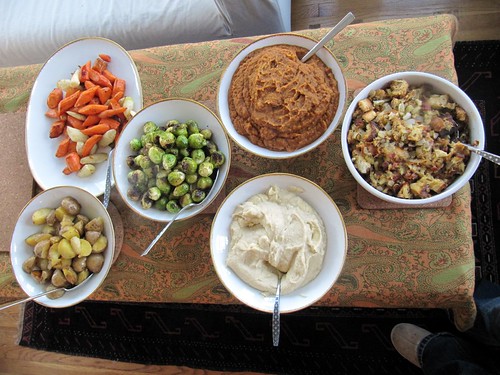
Maybe this is blasphemy, but I think turkey is turkey and the sides are the exciting part – especially when your guests are not stodgy and you can play with flavors.

Thanksgiving Sides

Last year we roasted potatoes, carrots, and brussels sprouts, and made creamed turnips and these two winners:

For cranberry sauce, I like to make a traditional cooked version as well as a fresh version with orange.

What are your favorite Thanksgiving sides?

Middle Eastern Feast

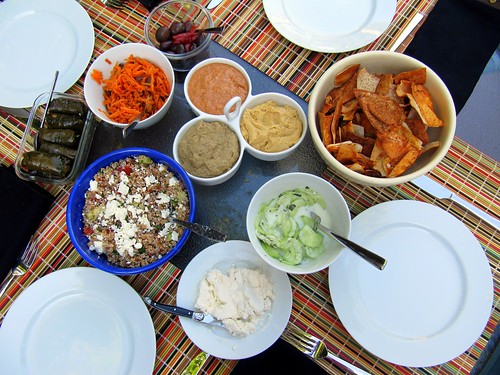
I’ve made all of the components of this meal separately, but this weekend I thought I’d put them all together to make a fun, informal meal for guests. This is a low-stress dinner party because almost everything can be made ahead and you can supplement with store-bought extras like pita bread, olives, and a tasty feta (try the Hungarian feta from the deli case at Sonia’s). For dessert, pick up some good dates – or if you are lucky like us, one of your guests will bring a delicious olive oil cake.

Bonus: this makes for great leftovers. I have to admit that the photo below is actually the leftovers, which we ate tonight with a couple of friends!

Middle Eastern Feast

Here are links to the recipes I used (or similar ones, because some of these live in my head):

If you’re in the Providence area, we picked up most of our ingredients at these two stores:

Three Days of Salmon

After a fishing trip to Alaska last year (which I still need to blog about), we have some large pieces of salmon in the freezer. As someone who rarely cooked fish before, this has given me a wonderful opportunity to try new recipes and cooking techniques.

The large pieces sometimes mean several days of salmon.  Crafting a new meal out of leftovers is a creative exercise of which I’m very fond!  Here’s how I got three delicious meals out of one generous piece of salmon.

Day 1
Dinner: White wine-poached salmon topped with Pungent Parsley and Caper Sauce.  Green and yellow beans almondine.

Salmon SandwichDay 2
Lunch: Salmon sandwiches on 7 Stars Olive Bread spread with leftover Parsley and Caper sauce.

Day 3
Brunch:  Salmon cake benedict on 7 Stars Olive Bread with bearnaise sauce.  The leftover salmon and sauce made 5 salmon cakes when mixed with some onion, egg, old bread, and spices.

Sometimes, leftovers can be quite luxurious.

Pictured above: A salmon sandwich I made on olive bread – albiet a different one